
SteelSeries Debuts The Apex: World’s Fastest Gaming Keyboard
SteelSeries, who is well known in the gaming world for killer...

Layout And Design
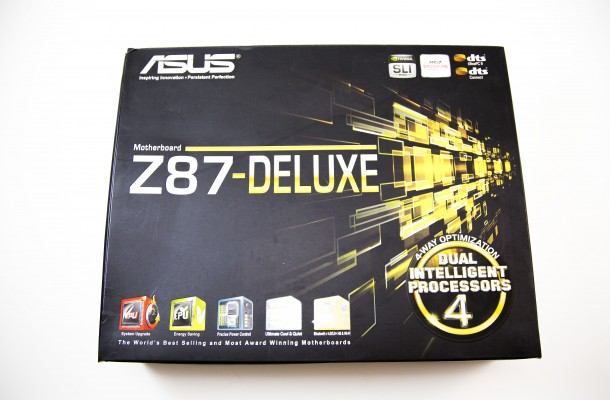
From your first look at the board you can see ASUS has changed their color scheme to a new Jet and Gold look that is much different than previous generation boards, which actually might put some users off.
I will admit that Jet and Gold only leaves room for a few different color variations when doing a mod build, but for those looking for that look it will be awesome. At the top left corner of the board we see the 8-Pin power connector, followed by the top of the cooling solution and then the first of the six fan headers that all have excellent Anti-Surge protection.
All of the connections can be controlled and custom named within the BIOS to match whatever you have hooked up as well. There are 2 CPU fan headers with both standard and PWM connections. One located to the top right of the CPU and the other to the bottom left of the CPU socket for easy connectivity. Using Fan Xpert 2, you can control and name each different connection as well as choose there various parameters, which is good for those using liquid cooled systems especially where you do not want a post error stating the CPU fan is not connected and be able to adjust your pump speeds.
There is actually plenty of room around the Z87 Socket for using a robust cooling solution using either air or liquid with the memory being located just far enough away to not get blocked by your cooling solution. As we move around the board from the top to the right is first the DRAM LED, then the Mem OK! button that allows you to reset the memory timing to timing that will allow the board to POST. This is a great feature if you change out the memory for really high-speed modules that are not immediately recognized allowing you to boot into the BIOS and make the proper voltage and RAS/CAS values to match your particular memory.

The memory slots are also located here as well and below them are the 24-pin power connectors, then followed by two fan headers. The board supports up to 2800MHz DDR3 at high XMP Profiles so most memory should work fine. Also located by the memory is the USB 3.0 header.

Next up are the SATA connections, which are also designated by color with the Intel Z87 SATA 6G connectors being in gold and the ASMedia SATA 6G in Jet. All the connections are right angled to make connections easier and more ergonomic in your build. These right-angled connections make things less messy than when the connections are just facing upwards on a board.

Below the 10 SATA ports are the TPU and EPU selector switches that both have different tasks that they handle. The EPU is essentially used for emery efficient usage while the TPU is geared for instant easy overclocking.

Continuing down the board we now come to the front panel connections that are silkscreened on the board and easy to read for quick setup times. The BIOS is removable from the board and it can be seen right below where it says WiFi 802.11ac on the Z87 Deluxe.

Next up is the DirectKey button that when pushed restarts the motherboard and makes it go directly into the BIOS upon its restart. The DirectKey also has a header to hook up your case instead of the standard restart cable if you choose to go that route.

There is also another fan header at the bottom of the board along with additional USB 2.0 connections. If you are an overclocker and push your board too far the clear CMOS button is also located at the bottom of the Deluxe as well as on the rear I/O if your case is closed. There are two sets of Q-Code LEDs that help determine if there are any problems with your motherboard or its other components. Q-LED 1 and 2 both show a distinct set of number values that specify a certain error that your board is having prior to BOOT. These values are shown in the manual if you need to see what the error code actually means when having problems.

The TPM connection is used for the Trusted Platform Module, which is used to store keys, digital passwords, data and is essentially a security feature. The power and reset buttons are located slightly to the left on the bottom and are sized just right for your fingertip to be ergonomic. The last things on the bottom of the board are the SPDIF and AAFP audio front panel connections.

Coming down the middle of the Z68 Deluxe are the various PCIe options sported. Right to the left of the VI Dual Intelligent Processors part of the cooling apparatus is the first PCIe 1x slot followed by the first PCIe 16X slot, and then there are two more PCIe 1x slots, another PCIe 16x slot, another PCIe 1x and finally the final PCIe 16x slot. It should be noted that Quad SLI configurations are possible via NVIDIA based solutions and configurations using dual GeForce GTX 690 cards, but only 3-way CrossFire is available for AMD configurations meaning no dual Radeon 7990s here folks.

Now we can jump to the rear I/O and see what it has to offer us in its design. Now this is actually a very well designed area as well dues to a couple of new things and where they have been placed. I will start from left to right in my description. We first see two USB 3.0 connectors that offer both quick charging and USB 3.0 Turbo Mode, which offers speeds 170% faster than standard USB 3.0 when engaged. Underneath them is the mini display port that is also a first for ASUS motherboards. Next up we see the digital audio SPDIF connection and under it are the standard display port and then the HDMI connector.

The next thing on the rear I/O used to be connected via the first PCIe 1x connector, but now is located on the rear panel is the WiFi connection. ASUS went all out here as the WiFi has support for WiFi 802.11 a/b/g/n/ac as well Bluetooth V4.0/3.0 and can used to remotely control your PC. Bundled with a 2.4GHz/5GHz dual-band 2T2R antenna so you can build your network without an extra router.
Both of the next sets of ports are basically identical with both having two USB 3.0 ports and a LAN port. Port 1 is based on Intel’s chipset and port 2 is based off the Realtek chipset. Last up on the layout and design is the analog audio ports that support 7.1-surround sound that also comes by way of the Realtek ALC 1150 chipset. Overall the board’s topography is laid out and done very well with no real design flaws that will cause the user problems.

SteelSeries, who is well known in the gaming world for killer...

Ever since the existence of phones, making devices thinner and lighter...

Just like any pre-Samsung phone release, somehow every phone on their...


Layout And Design Lets first take a look at NVIDIA’s reference model...